Text Classification Pipeline with Hugging Face Transformers
Text classification is one of the most practical tasks in NLP. If you’re starting out and want to build your first real-world text classification pipeline, this article will guide you through every step. Here, I’ll show you how to create a complete pipeline using Hugging Face Transformers, from data preparation to final predictions.
Building a Text Classification Pipeline with Hugging Face Transformers
Dataset: 20 Newsgroups
We’ll use the 20 Newsgroups dataset, a well-known text classification dataset containing ~18,000 newsgroup documents categorized into 20 topics. Let’s get started:
from sklearn.datasets import fetch_20newsgroups
from sklearn.model_selection import train_test_split

# load dataset
newsgroups = fetch_20newsgroups(subset='all', remove=('headers', 'footers', 'quotes'))

texts = newsgroups.data
labels = newsgroups.target
label_names = newsgroups.target_names

# split into train and test
train_texts, test_texts, train_labels, test_labels = train_test_split(
    texts, labels, test_size=0.2, random_state=42)
Tokenization with Hugging Face
Before we can feed our text data into a transformer model like DistilBERT, we need to convert the raw text into a numerical format that the model understands (known as tokenization). Unlike traditional NLP methods that rely on word-level features, transformer models use subword tokenization to break text into smaller, more meaningful units. Hugging Face provides pre-trained tokenizers designed to work with their models. In our case, we’ll use the distilbert-base-uncased tokenizer to process the news articles:
from transformers import AutoTokenizer

# load tokenizer
tokenizer = AutoTokenizer.from_pretrained("distilbert-base-uncased")

# tokenize text data
train_encodings = tokenizer(train_texts, truncation=True, padding=True, max_length=512)
test_encodings = tokenizer(test_texts, truncation=True, padding=True, max_length=512)
This tokenizer handles lowercasing, padding, and truncating, converting each input text into input_ids and attention_mask.
Create a PyTorch Dataset
Now that we’ve tokenized our text data, the next step is to structure it in a format suitable for training with PyTorch and Hugging Face’s Trainer API. Transformer models expect inputs like input_ids, attention_mask, and labels to be provided as tensors. To streamline this process and allow efficient data loading during training, we’ll create a custom Dataset class by subclassing torch.utils.data.Dataset:
import torch

class NewsGroupDataset(torch.utils.data.Dataset):
    def __init__(self, encodings, labels):
        self.encodings = encodings
        self.labels = labels

    def __len__(self):
        return len(self.labels)

    def __getitem__(self, idx):
        return {
            key: torch.tensor(val[idx]) for key, val in self.encodings.items()
        } | {"labels": torch.tensor(self.labels[idx])}

train_dataset = NewsGroupDataset(train_encodings, train_labels)
test_dataset = NewsGroupDataset(test_encodings, test_labels)
This class will take the tokenized encodings and corresponding labels and return them in the format the model expects.
Load Pretrained Transformer Model
With our dataset now properly tokenized and formatted, it’s time to select and load a pre-trained transformer model for our classification task. Instead of training a model from scratch, which requires massive data and compute, we leverage AutoModelForSequenceClassification, which wraps pre-trained models like BERT, DistilBERT, and RoBERTa specifically for classification problems. In this case, we’ll use distilbert-base-uncased, a lightweight version of BERT that’s faster and still highly effective:
from transformers import AutoModelForSequenceClassification

model = AutoModelForSequenceClassification.from_pretrained(
    "distilbert-base-uncased", num_labels=20)
Since our dataset has 20 unique categories, we set num_labels=20 to adapt the model’s final classification layer accordingly.
Define Training Configuration
Before we can train our model, we need to define the training configuration, which includes how the model should learn, how often to evaluate, when to save checkpoints, and other essential hyperparameters.
Hugging Face provides a convenient TrainingArguments class that lets us configure all of this in one place. We’ll specify parameters such as the learning rate, batch sizes, number of training epochs, weight decay for regularization, and logging frequency. Additionally, we will define a compute_metrics function to evaluate our model using accuracy during training:
from transformers import TrainingArguments, Trainer
import numpy as np
from sklearn.metrics import accuracy_score

def compute_metrics(p):
    preds = np.argmax(p.predictions, axis=1)
    return {"accuracy": accuracy_score(p.label_ids, preds)}

training_args = TrainingArguments(
    output_dir="./results",
    do_train=True,
    do_eval=True,
    learning_rate=2e-5,
    per_device_train_batch_size=8,
    per_device_eval_batch_size=8,
    num_train_epochs=3,
    weight_decay=0.01,
    logging_dir="./logs",
    logging_steps=100,
    save_strategy="epoch",
    eval_steps=500
)
This setup ensures our model is trained efficiently and consistently assessed throughout the process.
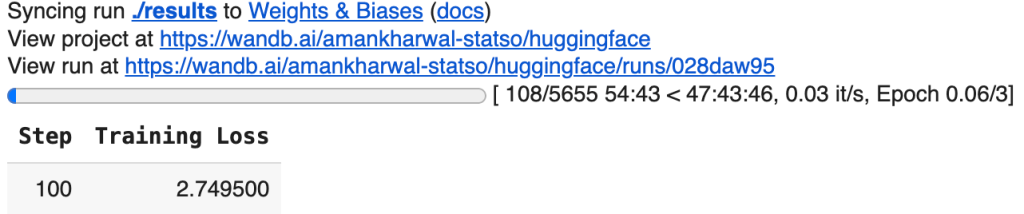
Train the Model
With our model, datasets, training arguments, and evaluation metrics all defined, we’re ready to bring everything together using Hugging Face’s Trainer API.
The Trainer class abstracts away much of the boilerplate involved in training a transformer model, handling batching, optimization, evaluation, logging, and checkpointing behind the scenes. By passing in our model, training configuration, datasets, and metric function, we can initiate the fine-tuning process in a single line of code:
trainer = Trainer(
    model=model,
    args=training_args,
    train_dataset=train_dataset,
    eval_dataset=test_dataset,
    compute_metrics=compute_metrics
)
It enables experimentation to be faster, cleaner, and easier to scale.
Make Predictions
Now that our model is trained, the final step is to use it for making predictions on new, unseen text. This process is called inference. In a real-world scenario, you might receive raw text data, like an email, a news headline, or a customer message, and you want the model to classify it into one of the predefined categories.
To do this, we first tokenize the input text using the same tokenizer used during training, convert it into tensors, and pass it through the model:
text = "The government passed a new law affecting international trade."

inputs = tokenizer(text, return_tensors="pt", truncation=True, padding=True, max_length=512)
outputs = model(**inputs)
predicted_class = outputs.logits.argmax().item()

print(f"Predicted Topic: {label_names[predicted_class]}")
Predicted Topic: talk.politics.misc
The model outputs a set of logits (unnormalized predictions), and we select the index with the highest score as the predicted class.
Final Words
Text classification with Hugging Face Transformers offers a powerful and efficient approach for transforming raw text into actionable insights by leveraging state-of-the-art NLP models. By following this pipeline, from loading data and tokenization to model training and inference, you now have a solid foundation for building, fine-tuning, and deploying real-world NLP solutions. Whether you’re classifying emails, reviews, or news articles, this approach scales effortlessly and sets you up for production-ready applications.